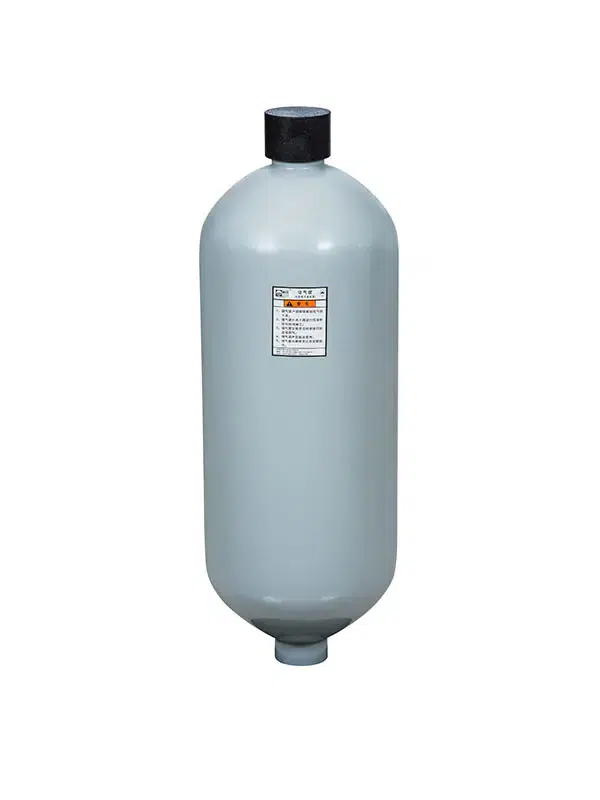

Hydraulic accumulators store pressurized fluid energy and release it when system demand rises. When an accumulator begins to fail, the symptoms are often indirect: pressure fluctuates, actuators cycle more slowly, the pump runs more often, or the system becomes noisy and overheated. In some cases, the first clear sign is an external oil leak or a sudden loss of pressure-holding capability.
This guide outlines a safety-first approach to checking whether a hydraulic accumulator is faulty. It covers three practical field checks, common warning signs, and maintenance practices that help detect problems before they cause downtime or safety incidents.
Key Takeaways
- Three field checks can help identify a faulty accumulator: temperature differential checks, pressure gauge and static decay monitoring, and nitrogen precharge testing.
- Warning signs include slow cycles, pressure fluctuations, frequent pump recharge, knocking noises, overheating, and leakage.
- Inspect accumulators every three to six months and record baseline pressure, temperature, and precharge readings.
- A nitrogen precharge reading below the manufacturer’s specification is one of the most direct indicators of an accumulator fault.
- Always depressurize, isolate, and follow Lockout/Tagout procedures before connecting test equipment.
Three Field Checks for a Faulty Accumulator

1. Temperature Differential Check
Infrared thermography or contact temperature measurement can be used to check the accumulator shell without dismantling components. During normal operation, the bottom of some accumulator shells may be warmer than the top because hydraulic fluid flowing in and out generates friction heat. In a bladder-type accumulator, the internal bladder contracts and expands as system pressure changes.
When performing this check, be aware that ambient airflow and direct sunlight can skew infrared readings. Measure the shell at the same relative height on both the top and bottom, and avoid measuring near welded joints or pipe connections. In a healthy bladder accumulator operating at typical industrial temperatures (e.g., 40–60°C fluid temperature), the bottom is typically 2–5°C warmer than the top. If the temperatures equalize, the accumulator may have lost nitrogen precharge, suffered a bladder rupture, or be operating with a precharge pressure higher than expected.
Field Note: Piston accumulators normally exhibit a larger temperature differential (often 5–10°C) than bladder types due to their different gas-fluid separation mechanism. Do not judge a piston accumulator using bladder-specific temperature baselines. Temperature alone is not conclusive. The most reliable approach is to compare current readings with historical baseline data for the same accumulator under similar conditions.
2. Pressure Gauge and Static Decay Check
Shut down and isolate the system, then observe the hydraulic pressure gauge. If pressure decays abnormally during a static pressure decay test, or if the pump recharges more frequently than normal, the accumulator may no longer be holding pressure effectively.
Field references often cite generic thresholds for static pressure decay, but these numbers can be dangerously misleading if applied without context. A specific pressure drop rate might be normal for a large-volume system under certain thermal conditions, yet catastrophic for a small accumulator. Never use a universal number to condemn an accumulator. Instead, compare the static decay curve against the manufacturer’s specified precharge pressure and the system’s historical baseline.
Case Study: In a typical 10-liter bladder accumulator system, a healthy unit might hold pressure for 30 minutes before dropping 10% below the precharge pressure. If the same system drops to zero within 5 minutes without external leakage, it indicates a complete loss of gas precharge or a ruptured bladder. If the pump recharge frequency increases from once every 10 minutes to once every 2 minutes, the accumulator has likely lost its gas volume. A more reliable diagnosis comes from comparing current decay curves with historical data, recording pressure versus time after shutdown, and checking pump cycle frequency and actuator response.
3. Nitrogen Precharge Test
A nitrogen charging unit provides the most direct field confirmation of precharge condition. Connect the charging unit to the gas valve, read the precharge pressure, correct for temperature, and compare it with the manufacturer’s specification.
Temperature Correction: The ideal gas law applies here: P2=P1×(T2/T1), where T is absolute temperature (Kelvin). For example, if the precharge pressure is 100 bar at 20°C (293K), and the system operates at 50°C (323K), the expected precharge pressure would be approximately 100×(323/293)=110 bar. A reading significantly above or below this corrected value indicates a fault.
A reading below specification confirms insufficient precharge or nitrogen loss. If pressure drops again shortly after recharging, leakage through the gas valve, seals, or bladder is likely. For accurate results, the hydraulic side must be depressurized and the fluid temperature should be stable. Use charging tools, valve blocks, hoses, and fittings that are compatible with the accumulator and rated for the correct pressure. For example, AQF/SAF valve blocks and nitrogen charging tools from Chaori simplify this testing process, enabling technicians to charge the accumulator to the correct precharge pressure and quickly verify the results. Follow the manufacturer’s charging procedure exactly.
Other Signs of a Faulty Accumulator
Slow Cycles and Pressure Drops
Accumulator failure often appears as a change in system behavior. You may observe increased pressure fluctuations, slower operating cycles, longer pump run times, poor response during peak flow demand, or reduced pressure-holding capability. These signs indicate that the accumulator has lost its ability to store and release energy effectively.
Diagnostic tools can monitor real-time pressure data and compare actual values with commanded values during startup, idle, and loaded conditions. The percentage deviation helps indicate whether accumulator performance has degraded. A leak-down test can also help identify internal pressure loss in the high-pressure circuit.
Noise, Overheating, and Leaks
Knocking, banging, or abnormal vibration, overheating of the accumulator shell or hydraulic fluid, and fluid leaks are strong indicators of accumulator failure. External leaks often appear around shell edges, pipe connections, and charging valves. Oil dripping near a connection suggests seal failure, while hydraulic fluid inside the bladder indicates a severe rupture or puncture. Visible oil stains, wet spots, or a shell coated in oil are clear signs of external leakage caused by seal failure.
Bladder-type accumulators with these symptoms often require repair or replacement. Piston and diaphragm accumulators have different failure modes and should be checked according to the manufacturer’s instructions.
System-Specific Differences
Air conditioning system accumulators may show different symptoms, such as refrigerant leaks and reduced cooling performance. Vehicle suspension accumulators may be assessed through road testing and changes in ride height or handling. Do not apply the same thresholds across different applications.
Matching the accumulator type to the application is also critical for long-term reliability. Bladder accumulators are widely used in general hydraulic systems for their fast response and compact design, but they are more susceptible to bladder rupture and gas permeation. Piston accumulators excel in high-pressure, high-cycle applications, though they require careful monitoring for piston seal wear and shell scoring. Diaphragm accumulators are ideal for small-volume systems where strict gas-fluid separation is mandatory, but the diaphragm can develop cracks over time. Understanding these failure modes helps maintenance teams select the correct replacement from a trusted manufacturer like Chaori.
Maintenance Practices That Prevent Surprises

Schedule Periodic Inspections
For most systems, inspect accumulators every three to six months. Record baseline data so you can detect trends over time. The table below lists useful record items.
| Record Item | Purpose |
|---|---|
| Inspection date | Trend tracking |
| Ambient temperature | Precharge temperature correction |
| System pressure | Operating and shutdown pressure |
| Top and bottom shell temperature | Temperature differential check |
| Precharge pressure | Nitrogen charge condition |
| Static pressure decay | Pressure-holding capability |
| Pump cycle frequency | Indicates excessive recharge |
| Noise, vibration, leaks | Early fault indicators |
When the system is shut down and fluid is drained, the pressure gauge may drop slowly at first and then rapidly fall to 0 psi. The point at which the rapid drop begins can approximate the precharge pressure, but this method depends on gauge accuracy and procedure. Recording precharge pressure over time allows early detection of slow nitrogen leaks.
Apply Temperature Corrections
Cold weather can reduce precharge volume by roughly 10% to 15%, while hot weather can cause precharge pressure to exceed expected values. Apply temperature corrections during every inspection. When selecting an accumulator, consider a capacity 10% to 20% larger than the calculated requirement to buffer normal temperature fluctuations, subject to system design and manufacturer recommendations.
Source Quality Components
Use accumulators and accessories from reputable manufacturers with relevant quality certifications. Common certifications include ISO9001, ASME, and CE, depending on the market and application. Chaori has been manufacturing hydraulic accumulators since 1978, operating an 18,000-square-meter production facility with a workforce of over 90 employees. For custom accumulators used in safety-critical systems, verify the applicable design standard and edition, burst-to-rated pressure requirements, hydrostatic or type testing requirements, third-party witness or manufacturer self-certification path, and compatibility of charging tools, check valves, and mounting clamps. Using incompatible or low-quality accessories can lead to charging difficulties, leakage, inaccurate pressure readings, and safety risks.
FAQ
How often should a hydraulic accumulator be checked?
For most systems, every three to six months is appropriate. Record baseline pressure, temperature, and precharge readings at each inspection. A running pressure drop that exceeds the normal fluctuation range should be investigated alongside pump cycle frequency. Always refer to the manufacturer’s manual for specific tolerances.
What confirms a faulty accumulator fastest?
A nitrogen charging unit reading below the manufacturer’s specified precharge pressure (after temperature correction) is one of the most direct confirmations. A rapid pressure drop after shutdown can support the diagnosis.
Can a faulty accumulator be repaired?
It depends on the type and extent of damage. Minor seal damage may be repairable. If the bladder is ruptured, the piston is cracked, or the shell is damaged, replacement is generally the safer option. Follow the manufacturer’s instructions and applicable standards.